
Views: 0 Author: Site Editor Publish Time: 2025-08-22 Origin: Site


How to cut fiberglass reinforced plastic cleanly? Mark your line, support the panel, fit the right blade, control dust, make a steady pass, deburr, and seal the edge. The fastest way to good results is tool choice by thickness: circular saw for straight cuts, jigsaw or oscillating tool for curves, and careful drilling for holes.
Mark and tape the cut line; clamp the panel on a firm backer
Choose a suitable FRP cutting tool and blade for the thickness
Connect dust extraction or use a wet method; wear PPE
Make a controlled cut with moderate feed and low chatter
Smooth the edge and seal fibers for safer handling
Cutting fiberglass reinforced plastic releases fine dust and tiny fibers. They do not belong in your eyes, lungs, or skin. Before you think about the best blade for cutting FRP or any fast method, set the basics.
Eye, breathing, and skin protection: Wear snug safety glasses or a face shield, a good dust mask or respirator, gloves, and long sleeves. This keeps fibers off your skin and out of your eyes and lungs.
Dust control: Pair the tool with a shop vacuum, or use a light mist to keep dust down if your space allows. Keep the nozzle close to the blade or bit. Avoid cutting indoors without capture.
Solid support: Place the panel on a straight, flat backer board or sacrificial sheet. Clamp both sides of the cut. A rigid setup reduces vibration and chipping.
Tape and score the line: Masking tape over the cut path helps reduce surface chipping. A light score with a utility knife improves tracking and keeps the finish cleaner.
Flip for a clean face: If one side must look perfect, cut with the good face down for saws that cut upward, or face up for tools that cut on the downstroke. Test on a scrap to confirm.
Keep it calm: The biggest mistakes happen when rushing. Feed steadily, let the blade work, and don’t force the tool.
Tip: If you are not sure how your blade will behave, make a short practice cut on a small offcut. You’ll learn how the material responds and set your technique before the real cut.
Not every FRP sheet is the same. Decorative liners, structural fiberglass panels, wave or corrugated panels, and sandwich cores cut differently. Use this matrix to choose a method that balances edge quality, speed, and dust.
| FRP thickness or type | Good straight‑cut options | Good curve/slot options | Edge quality | Speed | Dust and noise | Notes |
|---|---|---|---|---|---|---|
| Very thin sheet (≈ up to 1.5 mm) | Score and snap with a sharp knife; small fine‑tooth saw | Oscillating tool; fine‑tooth jigsaw | Clean if scored; saw can fray | Moderate | Low to moderate | Cut FRP with utility knife is possible here; multiple passes before snapping |
| Thin sheet (≈ 1.5–3 mm) | Circular saw with carbide or diamond; shears for soft laminates | Oscillating tool on small cuts; jigsaw slow | Good with taped line | Fast | Moderate | Cutting FRP with shears may work on softer sheets; test first |
| Medium panel (≈ 3–6 mm) | Circular saw with carbide; track saw is excellent | Jigsaw with fine metal blade for curves | Very good with steady feed | Fast | Moderate to high | How to cut FRP with a circular saw: clamp, tape, vacuum |
| Thick panel (≈ 6 mm and up) | Circular saw with carbide or diamond‑grit; angle grinder cut‑off | Jigsaw slower; oscillating tool for detail only | Good if well supported | Moderate | Higher | More heat; pause to clear dust; maintain control |
| Sandwich or honeycomb | Circular saw with carbide; support both skins | Jigsaw with fine blade; oscillating for corners | Good with backer support | Moderate | Moderate | Prevent skin tear‑out; tape both sides |
Plain‑English read: For most jobs, a circular saw gives the straightest, fastest cut on FRP panels. A jigsaw or an oscillating multi‑tool is your friend for curves, window cutouts, or tight corners. A utility knife can score very thin sheets; tin snips have limited use and can fray fibers if the laminate is stiff.
With fiberglass, the blade you choose decides how much you sand later. A smoother cut saves time. Here’s a table to help you pick an FRP cutting blade that matches the job.
| Blade or wheel type | Where it shines | Edge quality | Feed feel | Dust and heat | Notes |
|---|---|---|---|---|---|
| Carbide‑tipped circular saw blade (low tooth count) | Straight cuts on small to thick panels | Very good with tape and steady feed | Smooth if you don’t force it | Moderate | Best blade for cutting FRP for most panels; fewer, sharper teeth reduce chipping |
| Diamond‑grit circular blade (continuous rim or segmented) | Tough laminates, longer cuts, durability | Excellent with light feed | Smooth, grinding feel | Lower chip size | Great FRP cutting blade when you can’t tolerate chips; slower but very clean |
| Fiber‑reinforced cut‑off wheel (angle grinder) | Trims, notching thick edges, access cuts | Good with a steady hand | Requires control | Higher | Use carefully; respect kickback; finish with sanding |
| Fine metal jigsaw blade (bi‑metal, fine TPI) | Curves and small openings | Good; tape helps | Slow and controlled | Moderate | Avoid aggressive wood blades; follow a marked line |
| Oscillating tool carbide/diamond segment | Wall cutouts, corners, tight spaces | Very clean on local cuts | Precise, slow | Moderate | Cutting FRP with oscillating tool minimizes over‑cuts |
| Utility knife (new sharp blade) | Score and snap thin sheets | Clean for thin skins | Requires multiple passes | Very low | Cut FRP with utility knife only on very thin sheets; use a straightedge |
| Hand shears or tin snips | Very thin, softer sheets | Rougher; can fray | Easy | Low | Can you cut FRP with tin snips? Only on thin, flexible sheet; test before you commit |
Takeaway: A carbide circular blade is the everyday workhorse. A diamond‑grit blade trades speed for an even cleaner edge and reduced chipping. For delicate openings, an oscillating tool gives unmatched control.
The most common task is a straight cut across a fiberglass panel. A circular saw, or a track saw if you have one, is the fastest path to a clean edge. Here’s a simple, replicable method.
Plan the cut: Measure twice, mark your line, and decide which face should be perfect. Tape the line and extend it past the panel edges.
Support and clamp: Place the panel on a straight, flat backer board. Clamp on both sides of the cut to reduce vibration. Make sure the offcut is supported so it does not snap and tear fibers at the end.
Choose the blade: Fit a carbide‑tipped blade with fewer, sharp teeth, or a diamond‑grit FRP cutting blade if you want the smoothest edge. Confirm the blade is true and clean.
Control dust: Attach a vacuum hose near the guard. If you can, position a helper to keep the nozzle close to the blade exit.
Set the depth: Just deep enough to pass through the panel and lightly into the backer board. Shallow depth improves control and reduces chip‑out.
Make the pass: Start the saw outside the panel, let it reach full speed, and feed steadily. Keep both hands steady; do not push too fast or stall the blade. Let the blade do the work.
Finish and inspect: Allow the offcut to fall supported, not tear. Remove tape carefully. Sand any small fibers; consider sealing the edge for a smooth, safe finish.
Bonus tip: For glossy gel‑coat faces, add an extra layer of tape over the cut line and pull the tape back on itself after cutting to avoid lifting the finish.
Not every cut is a straight line. Door windows, vents, equipment cutouts, and rounded corners need control more than raw speed.
Jigsaw curves: Use a fine, bi‑metal metal‑cutting blade with a high tooth count. Tape the cut line. Keep the shoe flat, and move slowly to avoid blade wander. For tight curves, drill a starter hole inside the waste area and steer the blade gently. If the surface chips, try cutting with the finished face down or use a backer board.
Inside corners: An oscillating multi‑tool with a carbide or diamond segment blade shines here. It makes square corners without over‑cutting, ideal for tidy openings in finished FRP panels.
Controlling heat: With both tools, pause to clear dust and let the blade cool. Overheated blades chew instead of cut, which breaks more fibers and produces a rougher edge.
Use cases: Cutting FRP with oscillating tool is the go‑to move for electric box cutouts, tight door modifications, and on‑site tweaks when you can’t move the panel to a saw.
People ask if they can avoid powered tools on light panels or liners. Sometimes they can, sometimes not.
Cut FRP with utility knife: On very thin, flexible sheets, you can score along a metal straightedge several times with a fresh blade, then snap over a sharp edge of your bench or a dowel. Keep your offhand behind the blade path. This method yields a clean break with minimal dust.
Cutting FRP with shears: Hand shears work on thin, softer laminates, but they can pull fibers and leave a rough edge on stiffer sheets. Try a small test cut. Electric shears may improve speed but still risk fray on rigid FRP.
Can you cut FRP with tin snips: Only on very thin, flexible sheet. On thicker or stiffer panels, tin snips can distort the sheet and crack the finish. If the test cut looks rough, switch to a saw or oscillating tool.
Rule of thumb: If your FRP bends easily in your hands, hand tools might work. If it feels rigid, save time and edge quality by using a saw with the right blade.
You’ll often need holes for hinges, brackets, handles, vents, and fasteners. You want clean edges and no cracks. The method is simple and repeatable.
Can you drill through FRP: Absolutely. The trick is support, gentle pressure, and the right bit.
What is the best drill bit for FRP: Carbide‑tipped twist bits and brad‑point bits both work well. For thin sheets, a step bit reduces blow‑out and produces rounder, dimple‑free holes. Diamond‑grit hole saws are excellent for larger, clean openings with fewer chips.
Backing and tape: Place a sacrificial backer board behind the panel. Tape over both sides of the hole location to reduce chip‑out, then mark center on the tape.
Pilot and step: Start with a small pilot hole. Increase bit size gradually to the final diameter. This limits stress and avoids sudden grabs.
Light pressure and clean chips: Let the bit cut at its own pace. Withdraw periodically to clear dust. A vacuum close to the drilling point captures dust and keeps the bit cooler.
Finish the hole: Deburr lightly with sandpaper or a countersink. If the part faces weather, seal the hole wall with a compatible coating.
Little extras: If you need a slot rather than a round hole, drill two holes at the ends and connect with a jigsaw or an oscillating blade. Clean and seal the edges just like any cut.
Fresh‑cut FRP edges can have tiny fibers or a rough patch. Cleaning them up makes handling safer and, outdoors, helps keep moisture out.
Smooth the edge: A sanding block with medium‑then‑fine grit, or a hand file, levels nibs and stray fibers. A small chamfer softens the touch and reduces chip risk along the edge.
Seal fibers: A light coat of compatible resin, clearcoat, or paint can lock down fibers and improve edge durability. Outdoors, sealing helps block moisture and dirt.
Touch the surface: If you bumped the skin and made a small scuff, sand and touch it up. Quick fixes now prevent bigger problems later.
You do not need to overthink this. A few minutes with sandpaper and a small brush for sealer can make edges look and feel professional.
Cutting fiberglass reinforced plastic isn’t hard, but some missteps repeat across job sites. Here’s how to spot and fix them.
Too fast, too aggressive: Fast feeds and aggressive teeth can cause chipping. Slow down, tape the line, and switch to a smoother blade or a diamond‑grit wheel.
No support under the cut: If the offcut drops at the end, it can tear fibers. Support both sides and clamp the panel well.
Dry cutting without capture: Dust everywhere makes cleanup hard and increases exposure. Add a vacuum, use a helper, or try a light mist when appropriate.
Forcing a jigsaw: A wandering jigsaw blade makes a wavy line. Use a fresh, fine blade and keep the shoe planted. Consider an oscillating tool at tight corners to avoid over‑cuts.
Ignoring edge sealing: Leaving raw fibers poking out makes handling uncomfortable and can wick moisture. Sand and seal edges before calling it done.
If your first pass shows heavy chipping or fray, practice on scrap with tape and a different blade approach. A small change in method often transforms the result.
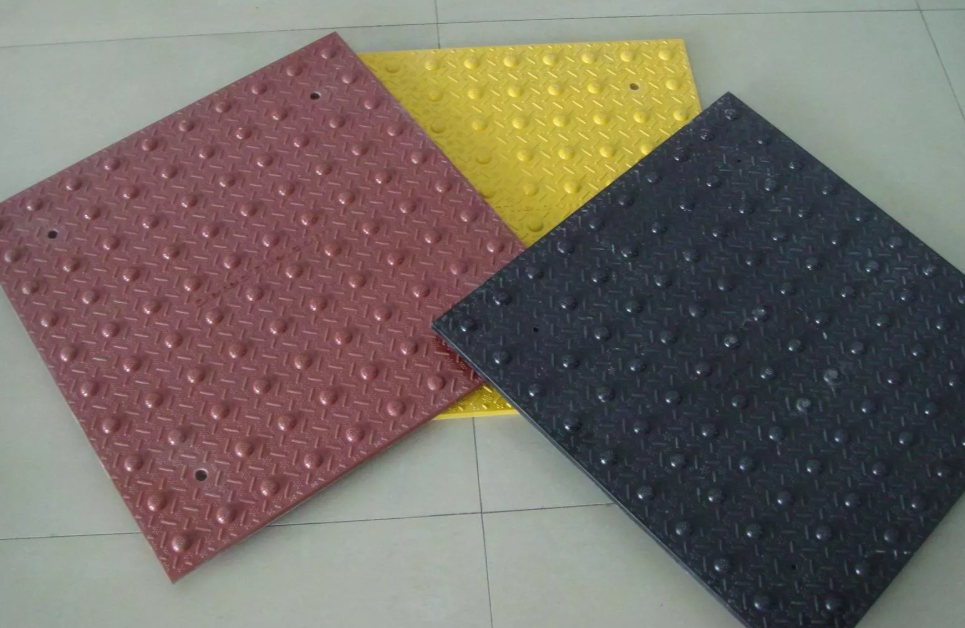
If you plan a project with multiple panels or need consistent sizes, it pays to work with parts designed for clean cutting. Modern fiberglass panels are built for outdoor duty and simple installation, and many users cut and drill them on site.
For real‑world examples and surface options, explore fiberglass panels built for long service and clean edges. You’ll see smooth faces, paint‑ready or gel‑coated finishes, and thickness ranges that suit both straight cuts and shaped openings.
Ordering checklist to speed things up:
Panel dimensions and thickness ranges you plan to cut
Which cuts you will do on site and which you prefer pre‑cut
Hole diameters, slot lengths, and positions (with simple drawings)
Edge expectations (square or chamfered) and whether you want factory‑sealed edges
Tools you have on site (circular saw, jigsaw, oscillating tool, drill) and any limits (indoor only, low dust)
Finish goals (gel coat color, paint plan) so you can match cutting and sealing methods
This approach reduces surprises during install and helps you get panels that work with the tools you already own.
Tip: If you’re looking for panels that cut clean and hold their look outside, review fiberglass panels and request guidance on cut allowances and recommended blades for your specific thickness.
Q1: Can FRP be cut with a knife?
A1: Thin decorative sheets can be scored several times along a straightedge and snapped over an edge with a sharp utility blade. This works when the sheet is flexible. For thicker or rigid fiberglass reinforced plastic, a knife risks fraying fibers and an uneven edge; switch to a saw with a suitable FRP cutting blade.
Q2: What kind of blade to cut FRP?
A2: A carbide‑tipped circular saw blade with fewer, sharp teeth works well for straight cuts on most panels. A diamond‑grit blade offers even cleaner edges with less chipping. For curves, use a fine metal jigsaw blade; for tight openings, use an oscillating tool with a carbide or diamond segment. The best blade for cutting FRP is the one that matches your thickness and cut type.
Q3: What is the best drill bit for FRP?
A3: Carbide‑tipped twist bits or brad‑point bits cut cleanly and last. On thin sheets, a step bit reduces blow‑out and leaves round holes. Always back the work with a sacrificial board, tape the hole location, drill a pilot first, and clear chips often.
Q4: Can you drill through FRP?
A4: Yes. Mark and tape the spot, support the back, and drill with light pressure. Start with a small pilot hole and step up to your final size. Deburr and seal the hole wall if the part will see weather or frequent handling.
Q5: Cutting FRP with oscillating tool—when should I use it?
A5: Use an oscillating multi‑tool for small openings, corners, and on‑site adjustments where control matters more than speed. Its precise motion minimizes over‑cuts and surface damage. Fit a carbide or diamond blade and work with steady, light pressure.
Q6: Can you cut FRP with tin snips?
A6: Only on very thin, flexible sheet. Tin snips and hand shears can distort stiff FRP and pull fibers, leaving a rough edge. If a test cut looks messy, change to a circular saw, jigsaw, or oscillating tool for a cleaner result.
Q7: How do I keep dust down and edges safe when cutting FRP?
A7: Wear eye and breathing protection, connect a shop vacuum to the tool, or mist lightly if allowed. Tape the cut line to reduce chipping, feed steadily, and sand the edge afterward. Seal cut edges with a compatible coating to lock fibers and improve handling.
Matching your cutting plan with the right material up front keeps projects on track. If you expect a lot of trimming and openings, pick panels that are stable, flat, and built for clean edges. Gel‑coated faces or paint‑ready surfaces handle tape and touch‑ups well. If your job calls for consistent holes and slots, consider pre‑cut service from your supplier for tight tolerances.
To see examples of panels that cut clean and install easily in outdoor and industrial settings, visit fiberglass panels and review sizes, finishes, and typical use cases. Then share your sketch and cutting needs. A good supplier can recommend the best FRP cutting tool and blade type for your exact thickness, plus sealing products that match your finish.
Searchers who ask how to cut fiberglass reinforced plastic want a clear answer fast, then a reliable method that works with common tools. This guide front‑loads a direct answer, a simple step list, and two tables that make decisions easy. It also answers niche questions like Cut FRP with utility knife, Cutting FRP with oscillating tool, Cutting FRP with shears, and Can you cut FRP with tin snips in plain terms.
Practical takeaways that move projects forward:
A circular saw with the right blade is your most consistent straight‑cut solution
An oscillating tool or jigsaw covers curves and tight openings without over‑cuts
Drilling clean holes is as simple as backing, taping, and stepping up bit sizes
Edge sanding and sealing reduce fiber fuzz and improve long‑term handling
Dust control and PPE are non‑negotiable for comfort and safety
When you combine these habits, you’ll get professional‑looking edges with less cleanup and fewer surprises.
You don’t need exotic gear to cut fiberglass reinforced plastic well. You need the right match of tool and blade, steady support, smart dust control, and a few easy finishing steps. For straight cuts, how to cut FRP with a circular saw is the quickest path: tape, clamp, shallow depth, and a steady feed with a suitable FRP cutting blade. For curves and openings, a fine‑tooth jigsaw or an oscillating multi‑tool gives precision without over‑cuts. For holes, pilot first and step up with a carbide or brad‑point bit; support the backer and tape the face for clean edges.
If you’re planning a run of panels or an outdoor install, choose materials that cut clean and hold their look. Review fiberglass panels for surface options and thicknesses, then send your drawings and cutting notes. The result is a smoother cut day, tidier edges, safer handling, and a finished job that looks as good up close as it does from across the street.
By applying the simple steps in this guide and matching your blades to your material, you’ll spend less time fighting fray and dust—and more time finishing the job right the first time.