 English

Views: 0 Author: Site Editor Publish Time: 2025-07-23 Origin: Site


You can put up fiberglass reinforced panels by following simple steps. These steps include measuring, cutting, getting the surface ready, putting on adhesive, and fitting the panels. Good planning and the right tools help you get a smooth and strong finish. A guide helps you not make mistakes and work on different surfaces easily. New market data shows fiberglass reinforced panels can cost more at first. But they last a long time and do not need much care, so the cost evens out. This guide also talks about how these panels are good for the environment. They do not rust and do not need to be replaced often. This makes them a smart choice for many places.

Get your tools and materials ready before you start working. Make sure you have everything you need. Clean the wall well and let it dry. This helps the panels stick better and stops problems later. Measure the wall carefully. Leave small spaces between panels. This lets them expand and look neat. Pick the right adhesive and spread it with a notched trowel. This helps the panels stick well. Wear safety gear like gloves, masks, and goggles. This keeps you safe when you cut and install the panels.
Get your tools and materials before you start. The right equipment helps you work faster. It also gives you a better finish. This part will help you get ready for easy installation.
You need some tools to do the job well. Here is a list to help you:
Pick adhesives made for FRP, like water-based ones. These are safer and easy to use inside.
Use a 'V' notched trowel to spread glue. A 3/8 inch wide and 1/4 inch deep trowel works best.
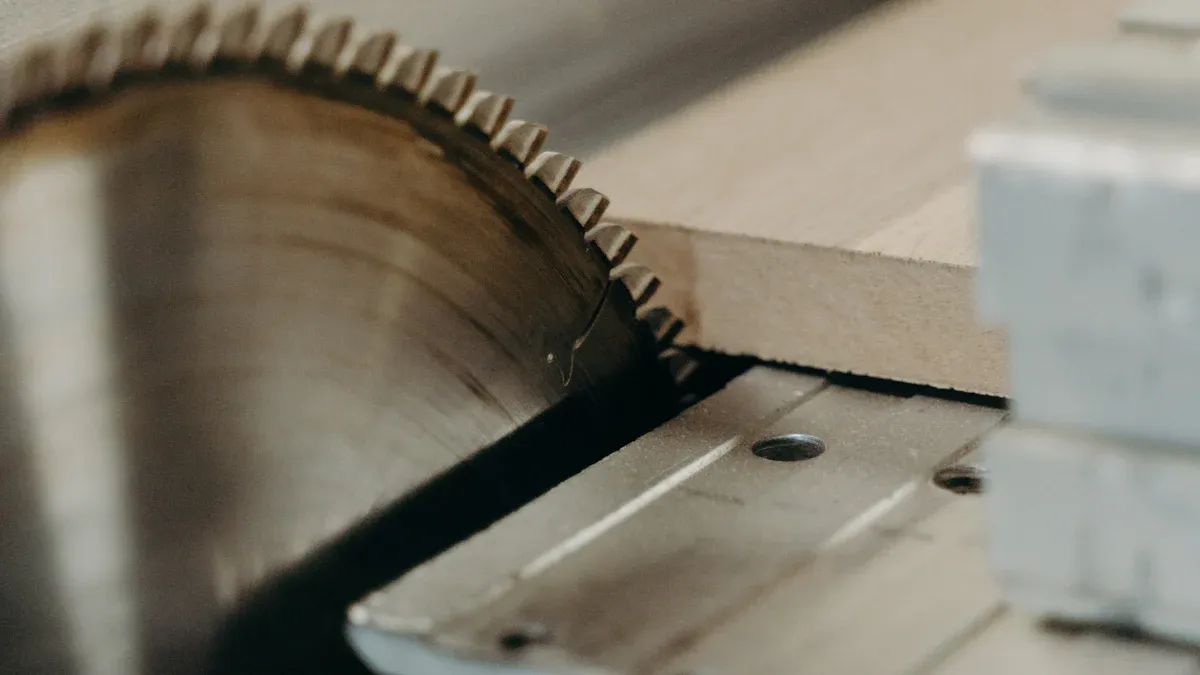
Cut panels with a fine-toothed saw blade. You can use a circular saw or jig saw. This stops the fiberglass from breaking.
Use aviation snips or bulldog snips for small cuts or tight spots.
Press panels down with a 'J' roller or a carpet-wrapped 2x4 block. This gets rid of air bubbles and helps the panel stick.
Sand the edges with a sanding block and 80 grit sandpaper. This makes the edges smooth.
Put FRP trim mouldings on by taping them to the panel before gluing.
Keep mineral spirits close if you use solvent-based glue. This helps you clean up fast.
These tools and materials make your job easier. They also help you avoid mistakes.
Get your materials ready before you begin. Here is a checklist to help you:
Fiberglass reinforced panels (pick the right size and thickness)
FRP-specific adhesive
FRP trim mouldings
Fasteners (if your wall needs them)
Cleaning supplies for getting the surface ready
Measuring tape and pencil for marking
Other products like fiberglass box or planters if needed
Tip: Pick panels that meet ASTM D-5319 and USDA rules for food-safe places. Look for Class A or Class C fire ratings if you need to follow building codes.
Safety is very important when working with fiberglass panels. You should protect your skin, eyes, and lungs. The table below shows what you need:
Safety Gear / Practice | Recommendation Details |
|---|---|
Clothing | Wear loose, long-sleeved shirts and long pants to stop skin irritation. |
Headcover | Use a headcover, especially if you work above your head, to protect your head and neck. |
Gloves | Wear gloves to keep fiberglass off your skin and stop irritation. |
Respiratory Protection | Use an N95 mask if it is dusty or you cut many panels. |
Eye Protection | Wear safety glasses or goggles to keep dust and fibers out of your eyes. |
Work Practices | Do not tape sleeves or pants at wrists or ankles. Brush off dust before you leave the work area. |
If you follow these steps and use the right tools, you can install fiberglass reinforced panels safely and easily.
First, make sure your walls are dry and clean. Wipe away dust, grease, and any loose paint. If you see mold or mildew, clean it with a gentle cleaner. Let the area dry all the way. Never put fiberglass reinforced panels on wet walls. Wet walls can make the glue weak and cause trouble later. Always check that nothing dirty is left on the wall before you start.
Walls are not all the same, so you need different steps. Look at the table to see how to get each wall ready:
Wall Surface | Preparation Process | Adhesive and Installation Notes |
|---|---|---|
Drywall | Clean, dry, remove dust and flaking paint; fix damage or uneven spots | Use FRP adhesive with a notched trowel; press panels from bottom up; smooth air pockets with roller |
Concrete/Masonry | Repair cracks/holes; clean and dry; add furring strips and plywood if uneven | Use solvent-based or epoxy adhesive; apply generously; may need bracing or fasteners |
Stud Walls | Cover studs with 1/2" or 5/8" plywood or drywall to create a flat surface | Install FRP as over drywall; use corner guards and divider bars; never attach directly to studs |
Pick the right glue for your wall type. Fast grab FRP adhesive works best on drywall or plywood. For smooth walls, use advanced polymer adhesive. Always read the instructions from the maker for the best results.
Tip: Keep the room between 50°F and 90°F when you work. Let the panels and glue stay in the room for 24 hours before you start. This helps the panels get used to the room and stick better.
Measuring and cutting right is very important. Use a tape measure to check the height and width of your walls. Mark where each panel will go. Leave a small gap, about 1/8 inch, between panels and at the edges. This gap lets the panels move when the temperature changes. Careful measuring and planning help you avoid mistakes and make your work look neat.
When you follow these steps, you make the job easier. If you want to learn more about fiberglass panels or other products, visit Jianan’s product page. Good prep makes the rest of the job simple.
You need to mark your fiberglass reinforced panels before you cut them. This step helps you get accurate results and avoid waste.
Use a tape measure to find the exact spot where you want to cut.
Mark the cutting line with a Sharpie or marker on the finished side of the panel.
Keep the protective plastic film on the panel while you mark. This film protects the surface and makes your lines easy to see.
The static charge from the plastic film can catch dust and help you see your marks better. You can rub the plastic with your hand or a piece of wool to boost this effect.
Always use a straight edge to draw your lines. This keeps your cuts straight and neat.
Tip: Careful measuring and cutting at this stage will save you time and materials later.
Cutting fiberglass reinforced panels takes the right tools and a steady hand.
Use a circular saw with a carbide-tipped or diamond-coated blade for thick panels.
For thin panels, score the surface with a sharp knife and snap along the line.
Secure the panel on a stable surface to stop it from moving or vibrating.
Apply painter’s tape along the cutting line. This reduces chipping and keeps the edge clean.
Cut slowly and do not force the saw. A steady speed helps prevent cracks and melting.
For curves or special shapes, use a jigsaw with a fine-toothed blade.
After cutting, sand the edges with medium-grit sandpaper. This removes sharp spots and burrs.
Seal the cut edges with epoxy or a special FRP sealing kit. This step protects the panel from moisture and UV damage.
Always wear safety gear like gloves, goggles, and a mask when cutting. Fiberglass dust can irritate your skin and lungs.
Walls often have outlets, pipes, or corners that need special cuts.
Measure the size and location of each obstacle carefully.
Mark the area on your panel before you cut.
Use a jigsaw or snips for small or curved cuts.
Test-fit the panel before you glue it in place. Make small adjustments as needed for a snug fit.
For complex shapes, make a cardboard template first. Trace the template onto your panel for better accuracy.
You can use these steps for other fiberglass products, such as a fiberglass box or fiberglass cover, when you need custom shapes. Good measuring and cutting skills help you get a professional finish every time.
Pick the right adhesive for fiberglass reinforced panels. Some adhesives are epoxies, methacrylates, and urethanes. Each one has good and bad points. The table below shows how they compare:
Adhesive Type | Strengths | Weaknesses |
|---|---|---|
Epoxies | Strong bond, resists chemicals, good for tough places | Not very flexible, takes longer to dry |
Methacrylates | Flexible, dries fast, handles impacts well | Less time to move panels, can smell bad |
Urethanes | Flexible, strong, good for moving walls | Does not like moisture, dries quickly |
Experts say to use special glue dispensers for best results. These tools, like Uniflow’s hot melt and liquid polyurethane systems, spread glue evenly. Heated plates help you waste less glue and save money. This gives you a strong hold and a neat look.
When you put up frp panels, use a V-notched trowel to spread glue. Put glue in even lines on the back of the panel. Do not leave empty spots or thick blobs. Cover the edges and corners well. Always read the glue maker’s instructions for drying times.
Tip: Let the panels and glue sit in the room for 24 hours before you start. This helps them get used to the room’s air and temperature.
Sometimes glue is not enough to hold fiberglass reinforced panels. Fasteners give extra strength, especially in wet or busy places. You can use FRP bolts and nuts made from strong materials. These do not rust and last longer than metal ones in tough spots.
Other choices are:
Threaded inserts for parts you want to take off and put back
Nylon or peel rivets for quick jobs
Special screws for plastic
Snap fits and tabs for light panels
Pick your fastener based on your wall and how much weight the panel will hold. In kitchens or bathrooms, fasteners help keep panels from moving or falling off.
Putting panels in the right spot is very important. First, check the fit by holding each panel up dry. After you add glue, press the panel onto the wall. Use a roller to press from the top corner down and out. This pushes out air bubbles and helps the panel stick.
Follow these steps for best results:
Start at the bottom and put the panel on the wall.
Use the roller from the top corner, moving down and out.
Press hard on edges, corners, and around holes.
For big panels, ask someone to help you keep it straight.
Do not use your hands alone to press the panel. You might miss spots and leave air bubbles. This can make the panel lift or bend later.
Note: Always leave a small gap, about 1/8 inch, between panels and at the edges. This lets the panels move when it gets hot or cold.
Making panels straight and even makes your work look good. Take your time with this step. Mark the wall and use a level to help you. For a smooth look, use hidden clip systems. These hide fasteners and let you take panels off if needed.
Best ways to line up panels:
Measure and mark the wall for each panel.
Plan so you do not have tiny pieces at the edges.
Leave small gaps between panels.
Use trims or caulk to seal the seams.
Cover edges with trim or molding for a neat finish.
If you use hidden clips, drill holes for them and attach to the wall and panel. Press the panel onto the clips and check if it is straight. Move it if needed before the glue dries.
Tip: Clean the panels after you finish to remove glue or fingerprints. This makes your project look neat and shiny.
If you see bubbles, use the roller to push them out to the edge.
If the panel does not stick, check for dust or water on the wall.
If panels bend or pull apart, make the gaps bigger or use more flexible glue.
For uneven seams, move the panel before the glue dries.
You can use these steps for other fiberglass products, like a fiberglass box or cover, when you want a strong and neat job. Careful planning and slow work help you avoid mistakes and get the best results from your fiberglass reinforced panels.
You must seal the joints between fiberglass reinforced panels. This keeps out water and air. Sealing well stops leaks and damage. Here are some easy ways to do it:
Spray foam into the panel joints before sealing. This helps stop air from leaking out.
Put air barriers on both the inside and outside seams.
Use special peel-and-stick or liquid membranes outside. These keep water out but let vapor out.
Seal the inside seams so water cannot get behind the panels.
Pick sealing products like SIGA Wigluv 100 tape, Prosoco FastFlash, or ZIP System Liquid Flash. Make sure these work with your panels.
Tip: Always check that your sealing products match the wall surface, like OSB or plywood, for best results.
Trim pieces make your project look neat and finished. They also help seal the edges and cover gaps. You can use corner trims, divider bars, and end caps. These trims keep water and dirt out of the seams.
Cut trim pieces to fit each edge and corner.
Press the trim in place before the glue dries.
Put a small line of sealant behind the trim for extra safety.
Wipe away extra sealant for a clean look.
You can find trim for many fiberglass products, like fiberglass box and fiberglass cover panels. Good trim work makes your project look better and last longer.
When you finish, check your work carefully. This makes sure your sealing and finishing will last. Use this checklist:
Look at all panels and trims for cracks or scratches.
Check for gaps or missed spots in the sealing.
Make sure supports and fasteners are strong and tight.
Look at both inside and outside for chips or flaws.
Plan to check your panels twice a year for damage.
In wet places, check more often to find problems early.
Clean your panels often and fix small problems fast. Most panels from Jianan need little care because they do not rust or fade in the sun.
If you follow each step, your fiberglass reinforced panels will look great. Make sure the surface is clean and dry before you start. Pick the right adhesive for your job. Leave a small gap so the panels can move. When you install them the right way, FRP panels can fight off mold and strong chemicals. They also stand up to bumps and hits. With normal care, most panels last from 20 to 40 years. If your wall is tricky or your project is big, ask an expert for help. You can also check out Jianan’s fiberglass box and fiberglass cover to find what you need.
You can wash FRP panels with warm water and mild soap. Use a soft sponge or cloth to wipe them. Do not use rough pads or strong cleaners. Cleaning them often keeps them looking nice and helps them last longer.
Yes, you can put FRP wall panels on top of tiles. Make sure the tiles are clean, dry, and have no grease. Use a strong glue made for smooth surfaces. Always read the instructions from the maker for the best results.
You need a tape measure, a V-notched trowel, a fine-toothed saw, a roller, and safety gear. These tools help you measure, cut, and attach the panels.
You can use fiberglass box and fiberglass cover in kitchens, bathrooms, and factories. These products do not get damaged by water or chemicals. They work well with FRP wall panels for a full setup.
Tip: To learn more about FRP panels and other products, visit Jianan’s website for guides and product choices.